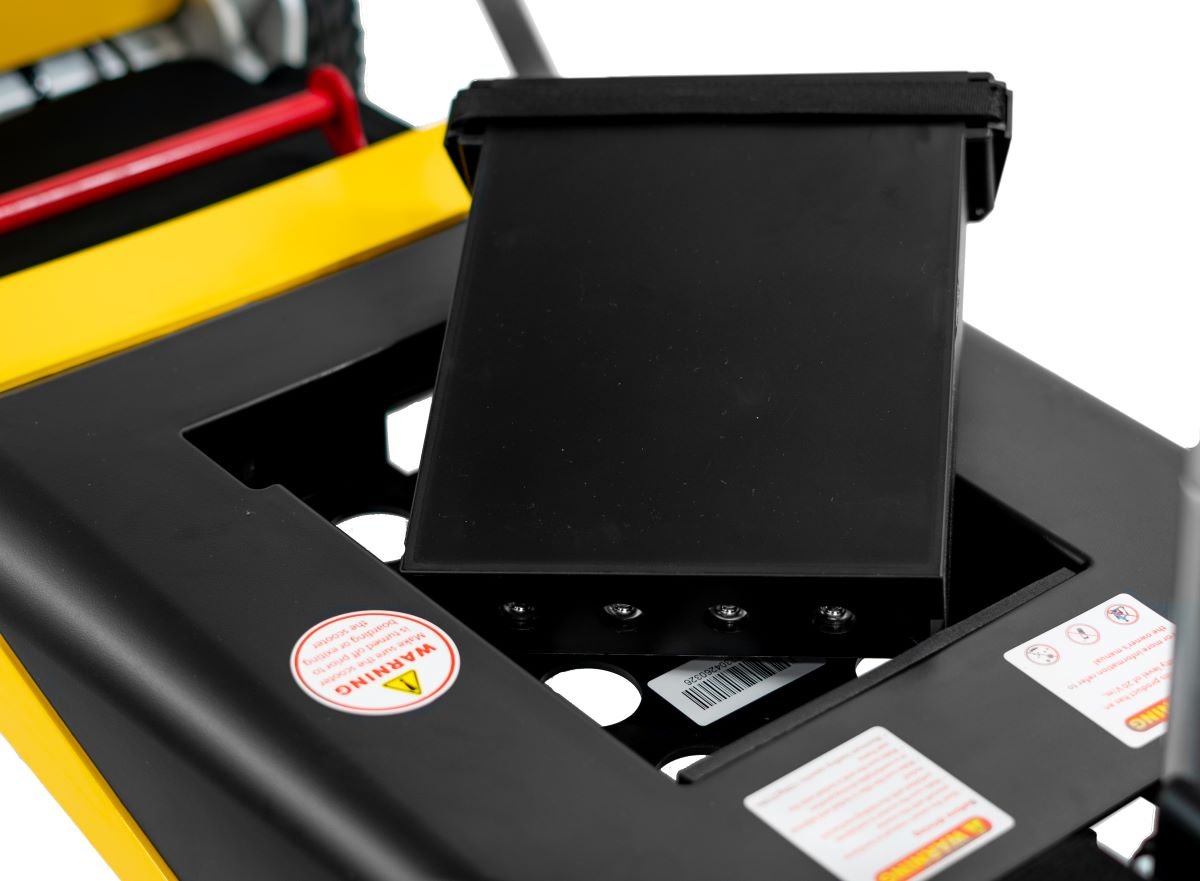
Lead acid Battery

  • electric scooter lithium battery pack close up 15

    Electric Scooter Battery Voltage Sag: Why It Happens and How to Fix

    Electric Scooter Battery Voltage Sag: Why It Happens and How to Fix

    You’re at a traffic light on your electric scooter, ready to accelerate, and instead of the usual pickup you expected — nothing. Or worse, the scooter cuts out entirely just a few hundred meters into your ride. The battery indicator shows half a charge. So why does your scooter feel so weak? The answer is almost always voltage sag, and understanding it can save you from an expensive — and unnecessary — battery replacement.

    Voltage sag is one of the most misunderstood phenomena in electric scooter batteries. Most riders think their battery is dead when they experience severe sag, but in many cases the battery is still functional. The key is knowing how to tell the difference between normal sag and problematic sag that signals a real battery problem.

    What Voltage Sag Actually Is (and Why Every Rider Should Understand It)

    A lead-acid battery’s voltage is not static. When a load (like your scooter’s motor) draws current, the battery’s terminal voltage drops temporarily. This drop is called voltage sag, and it’s a completely normal electrochemical behavior. Under no load, a healthy 12V lead-acid battery will read 12.7–12.9V. Under a moderate load, that voltage might drop to 11.5–12.0V. Under a heavy load — like accelerating up a hill — it might drop further to 10.5–11.0V.

    The scooter’s controller is calibrated with a low-voltage cutoff (LVCO), typically set at 10.5V per 12V module. For a 36V system (three batteries in series), that cutoff fires at about 31.5V total. If your battery voltage sags below that threshold even momentarily, the controller cuts power — which feels exactly like a dead battery, even if the battery would recover to normal voltage once the load is removed.

    Here’s a practical example: a brand-new 48V 20Ah lead-acid battery pack on a flat road might sag from 54.6V to 52.0V under acceleration — barely noticeable. An older, slightly sulfated battery under the same conditions might sag from 54.6V all the way to 46.0V — enough to trigger the LVCO and cut out your scooter at the worst possible moment.

    Measuring Voltage Sag: A Step-by-Step Diagnostic Anyone Can Do

    You don’t need professional equipment to diagnose voltage sag — just a cheap multimeter ($10–$20) and a methodical approach.

    Step 1: Measure open-circuit voltage first. Turn off your scooter and let the battery rest for at least 30 minutes. A healthy 12V unit should read 12.7–12.9V. If it reads 12.4–12.6V, it’s at about 80% charge. Below 12.0V, it’s significantly discharged.

    Step 2: Measure voltage under load. Have a helper hold the scooter securely (or brace it), set the multimeter to DC voltage, and have another person twist the throttle to full acceleration while you watch the meter. A healthy battery should stay above 10.5V under full load. If it drops to 9.0–10.5V, you have moderate sag. Below 9.0V under load means severe internal resistance — the battery is in trouble.

    Step 3: Compare after rest. After the load test, wait 30 seconds and measure again. A healthy battery recovers to within 0.5V of its open-circuit resting voltage. A battery with high internal resistance or sulfation will recover very slowly or not at all.

    !electric-scooter-lithium-battery-pack-close-up.jpg

    The Four Main Causes of Excessive Voltage Sag

    1. Sulfation (the most common cause). As lead sulfate crystals accumulate on the battery plates over time, they reduce the active surface area available for chemical reactions. A sulfated battery has higher internal resistance, which causes a much larger voltage drop under load. Sulfation is most commonly caused by leaving the battery at low state of charge for extended periods, or by repeated undercharging.

    2. Loose or corroded connectors. If the Anderson connectors, bullet terminals, or wiring between your battery and controller are loose, corroded, or frayed, they add significant resistance to the circuit. This resistance causes voltage to drop before it even reaches the motor — making it look exactly like battery failure. Corrosion appears as white, greenish, or bluish powder on terminals. A loose connection can also generate dangerous heat under load.

    3. Cold temperatures. Lead-acid batteries are highly temperature-sensitive. At 0°C (32°F), a lead-acid battery delivers only about 70–80% of its rated capacity, and voltage sag under load is significantly worse. At -20°C (-4°F), you might see only 50% capacity. If your scooter performed fine in summer but feels weak in winter, cold-temperature voltage sag is almost certainly the culprit — not a dead battery.

    4. Aged battery with high internal resistance. All lead-acid batteries degrade over time. The positive grid corrodes, the active material sheds from the plates, and the electrolyte gradually loses conductivity. A 3-year-old battery in daily use may have lost 30–50% of its rated capacity, and its voltage sag under load will reflect that. This is normal wear — not a defect.

    How to Fix Voltage Sag (and When the Battery Needs Replacing)

    For loose or corroded connectors: clean terminals with a baking soda and water paste, scrub with a wire brush, rinse, dry thoroughly, and apply a thin coat of petroleum jelly or anti-corrosion spray. Tighten all connections to the proper torque. This alone can eliminate a surprising amount of apparent sag.

    For sulfation: try an extended slow charge (24–48 hours at C/20 rate, about 1–2 amps for a 20Ah battery), which can sometimes partially reverse early-stage sulfation. Some smart chargers have a desulfation mode that pulses the battery with controlled overvoltage. For severe sulfation, the battery typically needs replacing.

    For cold temperature: store and charge the battery at room temperature. In winter, consider a battery with slightly higher Ah rating than your minimum requirement — the extra capacity gives you a buffer against cold-weather sag.

    For aged battery: if the battery is more than 2–3 years old with heavy daily use, and voltage sag is severe even with clean connectors, replacement is the practical solution. No charger or technique will restore a battery whose plates have physically degraded.
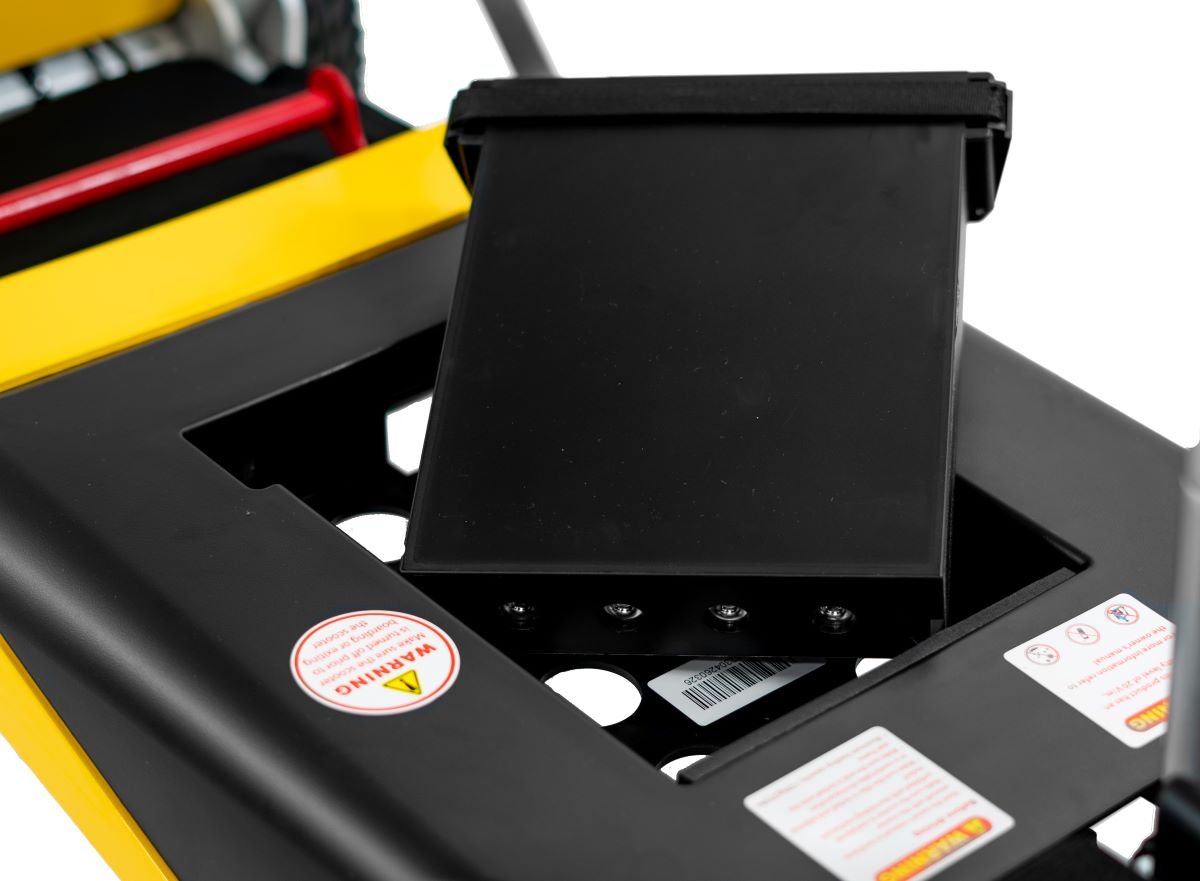
  • Electric Scooter Battery Swelling or Leaking: What to Do Immediately

    Electric Scooter Battery Swelling or Leaking: What to Do Immediately

    Your battery looks wrong. The case has expanded, the shape is warped, or you’ve noticed suspicious liquid seeping from the case. Your electric scooter battery swelling or leaking is an emergency—right now. A swollen or leaking battery is a serious fire and chemical hazard. You need to stop using it immediately, handle it carefully, and dispose of it properly.

    This guide tells you exactly what to do, why these problems happen, and how to prevent them. This is serious—please read carefully.

    STOP USING IMMEDIATELY

    If your battery is swollen or leaking, stop using your scooter immediately. Do not:

    • Attempt to charge it
    • Puncture or try to “release” the pressure
    • Continue riding it
    • Try to repair it yourself

    A swollen battery is a bomb. The internal chemical reactions have produced gas that’s expanding the case. Puncturing can cause immediate fire or explosion. Continuing to use it risks severe burns, fire, orexplosive rupture.

    Why Swelling Happens

    Swelling occurs when gas builds up inside the battery from chemical reactions. The most common causes:

    Overcharging: The most frequent cause. Charging too long, using the wrong charger, or a charger that doesn’t have automatic shutoff allows excessive current into the battery. The plates overheat, producing hydrogen gas faster than the battery can vent. Overcharging is almost always the cause of swelling in batteries that aren’t damaged physically.

    High Temperature Exposure: Heat accelerates all chemical reactions, including gas production. Leaving your scooter in direct sunlight, in a hot car (which can exceed 60°C), or charging in a hot garage causes expansion. Heat damage is cumulative—it doesn’t take one hot day; it’s repeated exposure.

    Physical Damage: A fall, impact, or crush can damage internal plates, creating internal short circuits. The short generates heat and gas locally, causing swelling in that area. The damage might not be visible externally—a scooter that has had a hard fall should have its battery inspected.

    Manufacturing Defect: In rare cases, a battery has a manufacturing defect—improperly sealed cells, contaminated electrolyte, or weak plates. These typically fail within the first few months of use. If your battery is new and swelling, it’s likely a manufacturing defect covered by warranty.

    Deeply Discharged Battery: A battery discharged below 10.5V (for a 12V battery) can suffer permanent damage. The discharge creates abnormal chemical reactions that produce gas when you attempt to recharge. This is why deeply discharging a battery destroys it.

    Why Leaking Happens

    Leaking indicates the battery case has cracked or the seals have failed. This can occur from:

    • Physical damage (cracked case)
    • Freezing (if a discharged battery freezes, the expanding ice cracks the case)
    • Corrosion eating through the case
    • Improper charging creating internal pressure

    Battery electrolyte (sulfuric acid diluted in water) is extremely corrosive. It can cause chemical burns on skin, damage metal, and ruin electronics. Handle a leaking battery with extreme caution.

    The Dangers Are Real

    Fire Risk: Swollen batteries can ignite spontaneously. The internal damage and gas buildup create conditions for thermal runaway. Once started, lead-acid battery fires are difficult to extinguish—they can reignite hours after appearing extinguished.

    Explosion Risk: In extreme cases,pressure can cause the battery to rupture explosively. Hydrogen gas (produced during charging) is explosive. A spark from a short circuit can ignite it.

    Chemical Burns: Sulfuric acid causes serious burns. If acid gets on your skin, flush immediately with plenty of water and seek medical attention. If it gets in your eyes, flush with water for 15 minutes and seek immediate medical help.

    What to Do Right Now

    If your battery is swelling or leaking:

    1. STOP USING IMMEDIATELY — This cannot be stressed enough
    2. Do NOT puncture — No matter how tempting
    3. Do NOT charge — Charging could cause fire
    4. If you can safely do so, disconnect the battery from the scooter:

    – Turn off the scooter’s power switch
    – If accessible, disconnect the battery leads

    1. Move the scooter to a non-flammable location:

    – Concrete, asphalt, or tile floor
    – Away from curtains, carpets, and flammable materials
    – Ideally outside

    1. Let the battery cool if it’s warm
    2. Do not touch leaked liquid—it’s battery acid
    3. Dispose of properly (see below)

    Disposal Instructions

    Lead-acid batteries are hazardous waste and cannot go in regular trash. You must recycle them properly. Options:

    • Auto parts stores: Most auto parts retailers accept old batteries for recycling—often with a core refund
    • Household hazardous waste facilities: Most cities have designated drop-off locations
    • Battery retailers: When you buy a new battery, the retailer usually accepts the old one
    • Municipal recycling centers: Call your city to find locations

    Never throw a lead-acid battery in regular trash. It’s illegal in most jurisdictions and pollutes the environment with lead and acid.

    Prevention Is Key

    Swelling and leaking are almost always preventable:

    • Use the correct charger: Match voltage and amperage exactly
    • Never overcharge: Use a charger with automatic shutoff, or set a timer
    • Avoid extreme temperatures: Don’t charge in heat or leave in direct sunlight
    • Handle carefully: Avoid dropping your scooter
    • Don’t discharge completely: Charge before battery is empty
    • Regular inspection: Check your battery monthly for signs of damage or deformation
  • Electric Scooter Battery Overheating: Causes, Dangers, and Fixes

    Electric Scooter Battery Overheating: Causes, Dangers, and Fixes

    Your battery is hot—too hot. You pull your scooter indoors and notice the battery case feels significantly warm, almost uncomfortable to touch. Your electric scooter battery overheating is a serious issue that needs immediate attention. A hot battery isn’t just uncomfortable—it’s a warning sign of conditions that can permanently damage your battery or start a fire.

    This guide explains the difference between normal warmth and dangerous heat, the exact causes of overheating, the real dangers, and the fixes that work. We take battery safety seriously at CHISEN, and we want you riding safely.

    Normal vs. Dangerous Temperatures

    Your battery should stay below 45°C (113°F) during charging. At this temperature, you can keep your hand on the battery comfortably. Above 50°C (122°F), the battery is too warm—you should stop charging and investigate. At 60°C (140°F), you’re in danger zone—thermal runaway can begin, and fire risk increases significantly.

    During normal use (discharging), batteries can warm up but should never become painfully hot. If you can’t comfortably keep your hand on the battery case, it’s overheating.

    Common Causes of Overheating

    1. Fast Charging with the Wrong Charger Using a charger with higher voltage or amperage than your battery is designed for causes rapid, dangerous heating. Your battery has specific charging requirements—for example, a 48V battery needs approximately 54-58V during charging. Using a 58.8V charger on a 54.6V battery will overcharge, generating massive heat. Always match your charger to your battery specifications exactly.

    2. High Ambient Temperature Charging in a hot environment compounds internal heating. Charging in direct sunlight, in a hot garage, or in a room above 30°C creates thermal buildup. In summer, temperatures can exceed 40°C in parked cars—never charge in a hot vehicle.

    3. High Discharge Rate Climbing steep hills, accelerating aggressively, or carrying heavy loads requires high current draw. This generates internal heat through resistance. The motor controller draws more current when you push the scooter hard, heating the entire electrical system. If you’re climbing hills regularly, expect some warmth—but it shouldn’t be excessive.

    4. Defective Cell A single weak cell can overheat during charge or discharge. The cell has high internal resistance, converting energy to heat. If your battery overheats in one specific spot, a defective cell is likely—stop using and inspect.

    5. Shorted Connector or Wiring A damaged wire with exposed copper creates a short circuit, generating enormous heat instantly. This can cause melting, smoke, and fire. Inspect all wiring for damage regularly.

    The Real Dangers of Overheating

    Thermal Runaway Starting at approximately 60°C (140°F), a chemical reaction begins in lead-acid batteries that generates more heat. This accelerates the reaction, creating more heat—a runaway cycle. Temperatures can exceed 150°C in minutes, causing the battery to vent gas, warp, or catch fire.

    Fire Risk Lead-acid batteries contain lead and sulfuric acid. Under extreme heat, the plastic case can melt, acid can leak, and hydrogen gas (explosive) can build up. Once fire starts, it’s difficult to extinguish—the lead component burns at high temperatures. The lithium polymer in some scooter batteries creates more fire risk.

    Permanent Capacity Loss Even without fire, heat damages battery plates. The accelerated chemical reactions that cause overheating permanently reduce capacity. A battery that overheats once may lose 10-30% of its capacity permanently.

  • Why Your Electric Scooter Battery Drains Too Fast – Quick Solutions

    Why Your Electric Scooter Battery Drains Too Fast – Quick Solutions

    Nothing is more annoying than watching your range disappear faster than it should. You charged your battery overnight, expect 40-50 kilometers, and after just 20 kilometers, the scooter is barely crawling. Your electric scooter battery drains too fast—but why? If your range has suddenly dropped, you want answers and solutions, not theory.

    This guide explains exactly why batteries lose capacity, how to diagnose which cause is affecting your scooter, and the practical fixes that work. We’ll look at real-world range expectations, the most common culprits for premature drain, and what you can do about each.

    Understanding Normal Range and Expected Degradation

    A new 48V 20Ah lead-acid battery in good condition should deliver approximately 40-50km of range under normal conditions (flat terrain, 70kg rider, moderate speed). This varies based on weight, terrain, speed, and weather—but if you’re significantly below these numbers, something is wrong.

    Lead-acid batteries naturally degrade over time. After 300 charge cycles (typically 1-2 years of daily use), expect 15-20% capacity loss. After 500 cycles, you might have 60-70% of original capacity. But if you’ve lost more than 40% range in under a year, or 50%+ range suddenly, the cause is likely something specific you can identify and address.

    Most Common Cause: Sulfation

    Sulfation is the lead-acid battery killer. When batteries sit partially discharged, lead sulfate crystals form on the plate surfaces. These crystals don’t conduct electricity well, reducing capacity and charging efficiency. Once hardened, sulfation permanently destroys battery plates.

    Sulfation typically causes:

    • Charging completes normally but voltage drops quickly under load
    • Battery takes longer to reach full charge
    • Range drops 30%+ in a few months
    • Battery feels “weak” even at full charge

    Fix: Use a desulfation charger or smart charger with desulfation mode. These chargers send controlled high-frequency pulses that break down lead sulfate crystals. For moderately sulfated batteries, this can recover 20-40% of lost capacity. For severe sulfation, replacement is the only option.

    Another Common Culprit: Loose Connections

    Every connection in your power system can degrade over time. Vibration, temperature cycles, and moisture cause connectors to loosen, corrode, or develop high resistance. Loose connections don’t stop power flow completely—they create resistance that converts electricity to heat and prevents efficient power delivery.

    Check these connections:

    • Battery terminal connections
    • Controller input and output
    • Motor connection
    • Any inline fuses or circuit breakers

    Look for corrosion (white or green powdery deposits), looseness, or heat discoloration. Clean connections with a wire brush, apply dielectric grease, and tighten securely. This is the single most overlooked cause of range problems.

    Cold Weather Reduces Capacity

    Cold weather drastically affects lead-acid battery performance. At 0°C, capacity drops approximately 20% compared to 25°C. At -20°C, you might have only 50% of rated capacity. If your range dropped dramatically in winter, this is likely normal—the cold is reducing capacity, not damaging the battery.

    This is temporary—capacity returns as temperatures warm. However, repeatedly charging in freezing conditions can cause permanent damage. If you store your scooter in freezing temperatures, remove the battery and store it at room temperature.

    Old Battery: Natural Capacity Fade

    Batteries have finite lifespans. Even with perfect care, lead-acid batteries lose approximately 5-7% of capacity per year and 1-2% per 100 charge cycles. If your battery is 3+ years old and showing 40%+ range loss, natural aging is probably the cause.

    There’s no fix for aging—battery chemistry simply fails over time. Budget batteries degrade faster; premium batteries like CHISEN maintain capacity better due to better plate chemistry, stronger construction, and proper maintenance. If you need a new battery, investing in higher quality pays off in longer service life.

    Over-Discharge Damage

    Repeatedly draining your battery below 20% state of charge accelerates degradation. Lead-acid batteries suffer permanent damage when deeply discharged. Each deep discharge (below 50% state of charge regularly) can reduce battery life by 20-30%.

    The fix is prevention: charge before you get below 20% remaining. If you’ve already damaged the battery from over-discharge, use desulfation charging to try recovery—but expect permanent capacity loss.

    Controller Issues Misdiagnosed as Battery Problems

    Your scooter’s controller limits power to the motor. If the controller has failed or is limiting power due to a fault, your scooter will feel sluggish even with a healthy battery. How to tell: run the scooter at full charge with no load (feet up). If the motor spins freely and strongly, but the scooter feels weak under rider weight, the problem may be the controller, not the battery.

    Also test: measure battery voltage at the controller under load. If voltage drops more than 5V from resting when you accelerate, there’s high resistance somewhere—possibly in the controller or wiring, not the battery.

  • Electric Scooter Battery Won’t Charge? Step-by-Step Troubleshooting

    Electric Scooter Battery Won’t Charge? Step-by-Step Troubleshooting

    Few things are more annoying than a scooter that won’t charge—the first step of your morning commute is already failed before you leave. Your electric scooter battery won’t charge, and you’re staring at a dead charger wondering if this is the end of your battery. Before you spend hundreds on a replacement, work through this systematic troubleshooting process. In our experience at CHISEN, approximately 70% of “dead” batteries we receive for warranty evaluation are actually fixable with simple repairs—and we’re going to show you how to diagnose the problem yourself.

    This guide walks through each component in the charging chain, from wall outlet to battery terminals, with specific voltage tests and actionable diagnostics. By the end, you’ll know exactly what’s failed and whether you can fix it or need professional help.

    Step 1: Verify Your Wall Outlet Works

    Start at the source. A dead outlet will make everything else seem broken. Test your outlet by plugging in a phone charger, lamp, or any device you know works. If nothing works, the outlet is dead—call an electrician to fix it before continuing.

    Try a different outlet if possible. Some outlets, particularly in older buildings, have degraded contacts that don’t provide consistent power. Moving to a different circuit might resolve your charging issues immediately.

    Step 2: Test Your Charger’s Output

    Your charger is the most common failure point. Chargers have no moving parts but contain transformers and rectifiers that fail, often without external signs. Use a multimeter to check output voltage.

    For a lead-acid battery charger, the output should be approximately 2.4-2.5V per cell when actively charging:

    • A 12V battery (6 cells) needs 29.4-30V during bulk charging
    • A 24V battery (12 cells) needs 58.8-60V
    • A 48V battery (24 cells) needs roughly 55-58V depending on stage (charging vs float)

    Set your multimeter to DC voltage, red lead on the positive output, black on negative. If you get zero or significantly lower than expected voltage, your charger is dead. Chargers typically cost $30-80 to replace—far cheaper than a new battery.

    Step 3: Inspect All Connectors

    Charging systems have multiple connection points, each a potential failure point. Examine these areas:

    Charger output plug: Look for bent pins, corrosion (white/green powder), or debris inside the port. Clean with compressed air and check that pins make solid contact.

    Battery connection terminals: Same inspection applies. Corroded terminals create high resistance, preventing charge current from flowing. Mix one tablespoon baking soda with water, scrub with a toothbrush, rinse with clean water, and dry thoroughly.

    Wire condition: Check along the entire charging cable for sharp bends, cracks, or exposed wires. Any damage to insulation can cause short circuits that disable charging.

    Step 4: Measure Battery Voltage

    With the multimeter, check your battery’s resting voltage. For a 12V lead-acid battery, resting voltage (measured 30 minutes after last charge/removal) should be:

    • 12.7-12.9V = Full charge (100%)
    • 12.4V = 75%
    • 12.0V = 50%
    • 11.7V = 25%
    • Below 10.5V = Dangerously low/deeply discharged

    Critical warning: If your battery shows below 9V (for a 12V system), it may be in a deeply discharged state from which recovery is difficult. However, it may not be dead—you can attempt a rescue charge.

    A deeply discharged battery may read 0-7V—this doesn’t automatically mean failure. The cells may have reverse-polarity issues where discharged cells resist charging. Use a smart charger with desulfation mode, or a low-voltage trickle charge (13.5V max for a 12V battery) for 24-48 hours. Monitor temperature—if the battery gets hot, stop charging immediately.

    Step 5: Check the Battery Management System (BMS)

    Many modern scooters include a BMS—electronics that manage charging, prevent overcharge, and protect cells. If your BMS has failed, the battery may appear dead.

    Test by measuring voltage at the BMS input and output terminals. If you have 54V coming in but 0V going out, the BMS has failed and needs replacement (or bypass if you understand the risks—bypassing BMS removes safety protections).

    When to Call a Professional vs Replace

    You should replace your battery if:

    • The case is swollen, cracked, or leaking
    • Battery voltage drops significantly under load (voltage sag >3V at rated discharge current)
    • Physical damage is visible
    • Battery is over 4-5 years old with poor performance

    You can fix yourself if:

    • Charger is the problem (easy replacement)
    • Connectors were corroded (clean and repair)
    • Battery was deeply discharged (recovery charge works ~30% of the time)
  • 10 Common Electric Scooter Battery Problems and Easy Fixes

    10 Common Electric Scooter Battery Problems and Easy Fixes

    If your electric scooter battery is acting up, you’re not alone. Thousands of riders encounter battery issues every month—from scooters that won’t charge in the morning to units that mysteriously lose power mid-commute. These problems can leave you stranded, late for work, or stuck with a scooter that runs for only a few blocks before dying. The good news? Most electric scooter battery problems have straightforward solutions you can diagnose and often fix yourself, without expensive shop visits.

    This guide covers the 10 most frequent battery issues electric scooter riders face, with practical fixes for each. Whether you ride a budget commuter scooter or a high-performance model, understanding these problems will help you get back on the road faster and extend your battery’s lifespan.

    1. Battery Won’t Charge at All

    The most frustrating problem: you plug in your charger, the indicator light stays off, and nothing happens. Before concluding the battery is dead, check these common culprits. First, verify your outlet works by testing it with another device. Then examine the charger—look for frayed cables, bent prongs, or a damaged plug head. Use a multimeter to test charger output: a 12V battery charger should output 13.8-14.4V (the float charge voltage), while a 48V system needs around 54.6-58.8V depending on the charging stage.

    If the charger tests good, the issue may be a deeply discharged battery. Lead-acid batteries can enter a “reverse polarity” state when discharged below 9.6V per 12V cell—essentially, some cells act as resistors rather than charge acceptors. Try a slow trickle charge for 24 hours using a smart charger set to low voltage (13.5V for a 12V battery), which can sometimes recover deeply discharged cells.

    2. Battery Charges Very Slowly

    If charging takes twice as long as it used to, your battery may be sulfated or your charger undersized. Sulfation—the buildup of lead sulfate crystals on battery plates—reduces charging efficiency and capacity. A properly maintained battery should charge to full in 6-8 hours. If yours takes 12+ hours, check the charger specifications match your battery voltage and amp-hour rating. Using a charger with lower amperage than recommended extends charging time dramatically: a 0.5A charger on a 20Ah battery means 40+ hours for a full charge.

    3. Battery Drains Overnight

    Waking up to a dead scooter after a full evening charge points to self-discharge issues. Healthy lead-acid batteries self-discharge at 3-5% per month at 20°C—if you’re losing 20%+ overnight, something is draining power. Common culprits include a faulty controller drawing standby current, corroded connectors creating parasitic paths, or a shorted cell. Check all connections for corrosion (white/green powdery deposits) and clean with a wire brush and baking soda solution.

    4. Range Is Much Lower Than Expected

    A new 48V 20Ah battery should deliver 40-50km of range under normal conditions. If you’re getting only 20-30km, your battery has degraded significantly—common after 300-500 charge cycles. However, sudden range drops often stem from external factors: low tire pressure increases rolling resistance, misaligned brakes create drag, or the controller’s power limit has dropped. Test your range on flat ground with properly inflated tires to isolate battery degradation from mechanical issues.

    5. Scooter Cuts Out Mid-Ride

    Experiencing sudden power loss while riding—then it comes back after restarting—is rarely a battery issue. More often, this indicates a loose connection in the wiring harness, a failing controller, or thermal protection triggering. The battery protection circuit (if present) may cut power when temperatures exceed 60°C to prevent thermal runaway. Let the scooter cool down before continuing; if problems persist, check all connector pins for looseness or oxidation.

    6. Battery Is Swelling

    Physical deformation is an emergency. Swelling indicates serious internal damage—typically from overcharging, excessive heat, or manufacturing defects. A swollen battery can rupture, causing fire or chemical burns. STOP USING IMMEDIATELY. Do not puncture, charge, or attempt to repair. Remove the battery if safely possible and dispose of properly at a certified recycling center. This battery cannot be safely used or revived.

    7. Battery Overheating During Charge

    Batteries should stay below 45°C during charging. Feeling significant heat (too hot to touch comfortably) indicates overcharging, a defective charger, or poor ventilation. Check that your charger matches your battery specifications exactly—using a 58.8V charger on a 54.6V battery will overcharge and generate excess heat. Charge in a cool, ventilated area and never on flammable surfaces.

    8. Battery Won’t Hold a Charge

    If your scooter runs fine while plugged in but dies immediately upon unplugging, the battery isn’t accepting or storing charge. This often indicates a failed cell, chronic undercharging damaging plates, or a parasitic drain. Test individual cell voltages with the battery at rest—if any cell measures significantly below others (more than 0.3V difference), that cell is failing and taking the whole pack down.

    9. Indicator Lights Show Problems

    Many scooters use LED indicators for battery status—if lights flicker, show red when charged, or behave erratically, the issue may be in the battery management system or wiring, not the battery itself. Check the battery voltage with a multimeter against what the indicator claims. A 48V battery showing 54V should display full green; if indicators disagree, troubleshoot the monitoring circuit.

    10. Physical Damage

    Cracks, dents, or leaks require immediate attention. Any exposure of battery internals (even a small crack) risks short circuits and fire. If the battery case is compromised, don’t use it. Place it in a fireproof container and dispose properly. Leaking battery acid is extremely corrosive—wear gloves and neutralize with baking soda before handling.

  • Electric Scooter Battery Daily Habits That Add Years to Its Life

    Electric Scooter Battery Daily Habits That Add Years to Its Life

    Most electric scooter riders treat their battery like an afterthought — plug it in, forget about it, repeat until the scooter stops working. The problem is that by the time you notice battery degradation, irreversible damage has already been done. The electrolyte has begun crystallizing, the plates have started sulfating, and the capacity you lost is gone for good. The difference between a battery that fails after 18 months and one that reliably powers your rides for four years often comes down to a handful of daily micro-habits that take less than five minutes total per day. This guide gives you all 12 of them, with the specific numbers and mechanisms that make each one matter.

    The 12 Daily Habits That Transform Battery Lifespan

    Habit 1: Charge after riding, not in anticipation of the next ride. This is the most impactful habit change most riders can make. A lead-acid battery stored at 100% state of charge experiences more positive grid corrosion than one stored at 50–80% SOC. If you ride 10 km per day and your scooter has a 30 km range, charging to 40–50% after your ride rather than topping up to 100% before every ride dramatically reduces the daily stress on your battery plates. Only perform a full 100% charge once per week to condition the battery’s charge acceptance.

    Habit 2: Wait 30 minutes after riding before plugging in the charger. The battery generates heat during discharge, and the chemical reaction is still active immediately after you stop. Charging a hot battery raises its internal temperature further, accelerating the corrosion and gassing reactions. A 30-minute rest allows the battery to cool to near-ambient temperature, giving you the safest charging conditions of the day. This single habit can add 10–15% to your battery’s total cycle life.

    Habit 3: Keep your state of charge between 40–80% for daily use. This is the most battery-friendly operating window for lead-acid chemistry. In this range, the plates experience minimal sulfation buildup, gassing is negligible, and the electrolyte remains stable. Think of it like the comfort zone for your battery — stressful full charges and damaging deep discharges are the extremes you want to avoid as routine practice.

    Habit 4: Check connector warmth during charging. After 30 minutes of charging, feel the charger connector and the battery terminals. Normal warmth (barely warm to the touch) indicates healthy charging. If the connector is hot to the touch, unplug immediately — this signals high resistance at the connection, which can melt the connector housing and create a fire risk. High resistance is usually caused by corrosion, a loose connection, or a mismatched charger.

    Habit 5: Never let your battery sit below 20% state of charge overnight. A lead-acid battery left at 20% SOC or lower for 24 hours begins accumulating hard sulfate crystals on the plate surfaces. These crystals are much harder to dissolve during the next charge than the soft sulfate that forms during normal operation. If you come home with a nearly depleted battery, charge it that evening, even if it’s just to 40–50% before you go to bed.

    Habit 6: Wipe down battery terminals weekly with a dry cloth. Dust, moisture, and road grime accumulate on battery terminals over days of riding. This buildup creates a slight electrical resistance that generates heat during charging and discharging. Once per week, disconnect the battery terminals, wipe them with a clean dry cloth, and apply a thin smear of petroleum jelly or a commercial terminal protectant. Reconnect firmly.

    Habit 7: Avoid charging in extreme temperature conditions. Never charge when the battery is frozen (below 0°C), and never charge in direct sunlight or inside a hot car in summer. The ideal charging temperature range is 10–25°C. Charging in temperatures outside this range accelerates degradation — at 35°C, your battery ages roughly twice as fast per charge cycle as it does at 25°C.

    Habit 8: Use the correct charger every single time. A charger with the wrong voltage will either under-charge your battery (causing chronic sulfation from consistently low SOC) or over-charge it (causing grid corrosion and electrolyte loss). Always match the charger voltage exactly to your battery pack (12V for a single 12V battery, 24V for two in series, 36V for three, etc.). The charger amperage should be 10–20% of the battery’s rated Ah capacity — so a 12Ah battery needs a 1.2–2.4A charger.

    Habit 9: Check for physical swelling once per week. Lead-acid batteries can swell from gas buildup if a cell fails internally or if chronic overcharging has produced excess hydrogen. A swollen battery case is a serious safety concern — do not continue using it. If you notice any bulging, warping, or cracking of the battery case, replace the battery immediately. CHISEN batteries include pressure-release valves for safety, but a visibly swollen battery indicates the valve has already been activated repeatedly, meaning the battery is near the end of its safe service life.

    Habit 10: Keep the battery firmly secured in its mount. Vibration and mechanical movement accelerate plate shedding in lead-acid batteries, particularly in off-road or rough-terrain riding. Check that your battery’s mounting brackets are tight and that the battery has some form of vibration dampening (rubber pads or foam) between the case and the mounting surface.

    Habit 11: Never overload your scooter beyond its rated weight capacity. Excess weight forces the motor and battery to work harder, drawing higher current that generates more heat in the battery. A scooter rated for 100 kg carrying a 120 kg rider may draw 20–30% more current during acceleration, accelerating battery wear on every ride.

    Habit 12: Perform a monthly equalization charge. Once per month, after a regular discharge cycle, leave your charger connected for an additional 2–3 hours after the green indicator appears. This “overcharge” at controlled voltage (14.4–14.7V) helps balance the charge across all cells and reverses any mild sulfation that has accumulated on the plates during the month. This is the one time intentionally charging slightly above normal full charge is beneficial.

    These 12 habits take approximately 4 minutes of active attention per day and require no special tools. Combined, they can double your battery’s effective service life compared to a rider who ignores these practices.

  • electric scooter lithium battery pack close up 13

    Lead-Acid Electric Scooter Battery Maintenance: Best Practices Most Riders Ignore

    Lead-Acid Electric Scooter Battery Maintenance: Best Practices Most Riders Ignore

    Lead-acid batteries are often described as “maintenance-free,” and while it’s true that sealed AGM and gel batteries don’t require you to add water, the phrase has led millions of riders to treat their batteries with a carelessness that cuts their lifespan in half. The truth is that lead-acid batteries — even sealed ones — respond dramatically to proper care. A few minutes of monthly attention can add 12–18 months of useful life to your battery pack, and that translates directly into money saved.

    This guide covers the maintenance practices that actually matter for electric scooter lead-acid batteries, separating the essentials from the marketing fluff.

    Why “Maintenance-Free” Is a Misleading Term

    When manufacturers call a battery “maintenance-free,” they mean that you don’t need to add water to it — the electrolyte is sealed inside and cannot be accessed without destroying the battery. What they don’t mean is that you can ignore it entirely. Sealed Lead-Acid (SLA) batteries, including AGM (Absorbed Glass Mat) and gel variants, still require voltage monitoring, proper charging discipline, and environmental care.

    The three biggest maintenance mistakes riders make with “maintenance-free” batteries:

    Mistake 1: Never checking voltage. Without a multimeter, you have no idea whether your battery is truly full, genuinely low, or somewhere in between. Most cheap e-scooter battery indicators are simply voltage sensors — and they become increasingly inaccurate as the battery ages. A battery that reads “full” on the dashboard may actually be at 60% SOC, delivering only half the expected range.

    Mistake 2: Always using the same charger. If your scooter’s original charger failed and you replaced it with a generic “12V battery charger,” you may be charging at the wrong voltage. A 12V lead-acid battery needs 14.4–14.7V for bulk charging (2.4–2.45V per cell). A charger set to 13.8V (for standby use) will never fully charge your battery. Over weeks and months, chronic undercharging causes progressive sulfation.

    Mistake 3: Storing the scooter for weeks at low charge. This is the single most damaging practice. A lead-acid battery left at 20–30% SOC for more than 2 weeks will develop significant sulfation. A battery left at 0% SOC for a month may not accept a charge at all without professional intervention.

    Monthly Maintenance Checklist for Electric Scooter Lead-Acid Batteries

    1. Measure resting voltage (once a month). Use a cheap multimeter ($10). Turn the scooter off and wait at least 30 minutes after your last ride. Probe the battery terminals directly. Read and record the voltage. Interpreting the results:

    • 12.7–12.9V: Fully charged (100% SOC)
    • 12.4–12.6V: About 75% SOC
    • 12.0–12.3V: About 50% SOC — charge soon
    • 11.8–12.0V: About 25% SOC — charge immediately
    • Below 11.8V: Critically low — may be damaged

    2. Inspect physical condition (every 2 weeks). Look for: swelling or bulging of the battery case (indicates overcharge or defect), cracks in the casing, corrosion on terminals (white/green/blue powder), leakage around seals or vent caps, and heat discoloration on the casing (dark patches near terminals indicate sustained high-temperature operation). Any of these signs warrant immediate attention.

    3. Clean terminals and connectors (monthly). Mix baking soda with water to make a paste. Apply to corroded terminals with an old toothbrush. Scrub thoroughly. Rinse with clean water and dry completely. Apply a thin layer of petroleum jelly or commercial battery terminal protector. This single practice can prevent 30–50% of connector-related power problems.

    4. Verify charger output voltage (every 3 months). Set your multimeter to DC voltage. With the charger connected to the battery (or probe the charger output terminals directly), measure the charging voltage. A 48V lead-acid charger should show 58.8–59.2V during bulk charging. If it shows below 57.6V, the charger isn’t delivering enough voltage to fully charge the battery. If it exceeds 62V, the charger is overcharging — a serious fire and damage risk.

    !electric-scooter-lithium-battery-pack-close-up.jpg

    Flooded Lead-Acid Batteries: The Maintenance That Actually Matters

    If your electric scooter uses a flooded (wet) lead-acid battery — most commonly 6V or 12V EV-series batteries that are user-accessible — water level maintenance is critical and non-negotiable. AGM and gel batteries are sealed and do not require watering, but flooded batteries lose water during every charge cycle through gassing.

    When to add water: Check water level every 4–6 weeks in summer (high temperatures accelerate water loss) and every 6–8 weeks in winter. Only check when the battery is fully charged. Remove the vent caps — the water level should be about 10–15mm above the top of the plates. If the plates are exposed, add distilled water until they’re submerged.

    What water to use: Always use distilled or deionized water. Tap water contains minerals that reduce battery performance and can cause permanent damage to the plates. A gallon of distilled water costs about $1 and can extend your battery life by months.

    Never overfill. The battery case expands slightly when hot, and the electrolyte can overflow if filled too high when cold. Leave at least 5mm of space below the vent well.

    Equalization Charging: The Secret Maintenance Technique Professionals Use

    Equalization is a controlled overcharge that deliberately drives the battery to 2.5V per cell (slightly above the normal 2.4V/cell bulk charge voltage) for an extended period — typically 12–24 hours. Its purpose is to:

    1. Equalize the charge across all cells (some cells naturally charge faster than others)
    2. Break down sulfate crystals that have formed on the plates
    3. Re-stratify the electrolyte in flooded batteries

    Not all chargers have an equalization mode. Smart chargers with a “repair” or “desulfation” mode will perform this automatically. If your charger doesn’t have this function, you can equalize manually by charging with a variable voltage power supply set to 2.45–2.5V per cell for 12–24 hours, monitoring the battery temperature throughout.

    How often: Once a month for batteries in daily use. Once every 3 months for batteries in occasional use. Never equalize a battery that is swelling, leaking, or has a cracked case.

    Seasonal Maintenance: Preparing Your Battery for Winter and Summer

    Before winter / cold season:

    • Perform a full equalization charge
    • Bring the battery indoors for charging (not a cold garage)
    • Store at 50–60% SOC (not full, not empty)
    • If storing the scooter for months: disconnect the battery from the scooter wiring to eliminate parasitic drain from the controller
    • Check every 4–6 weeks and recharge if resting voltage drops below 12.4V per 12V unit

    Before summer / hot season:

    • Verify charger voltage is within spec (heat accelerates overcharge damage)
    • Clean all connectors and apply anti-corrosion spray
    • Check that battery mounting is secure (heat causes expansion, loosening fasteners)
    • Consider a battery temperature monitor if you live in a region above 35°C ambient

    The most important seasonal habit: In hot climates, your battery degrades roughly twice as fast at 35°C ambient as at 20°C. If you live in a hot region, every 10°C increase in operating temperature roughly halves the battery’s expected lifespan. This makes summer maintenance not optional but essential.

  • Maximizing Electric Scooter Battery Performance Through Simple Maintenance

    Maximizing Electric Scooter Battery Performance Through Simple Maintenance

    Most electric scooter owners do not want maximum battery lifespan — they want maximum battery performance: the longest range, the strongest acceleration, the most reliable daily operation. Ironically, the practices that maximize performance in the short term often conflict with those that maximize longevity. The good news is that with a few strategic habits, you can achieve an excellent balance — getting outstanding daily performance from your battery while protecting its long-term health. This guide focuses on practical, everyday strategies to maximize the performance your battery delivers ride after ride.

    Understanding the Performance vs. Longevity Trade-Off

    Every time you fully charge and fully discharge your lead-acid battery, you consume one cycle from its limited total. Lead-acid batteries are rated for a specific number of cycles at a specific depth of discharge. At 80% depth of discharge (DOD), a quality lead-acid battery delivers approximately 400–600 cycles. At 50% DOD, that extends to 600–900 cycles. At 20% DOD, the same battery might deliver 1,500–2,000 cycles. This creates an obvious trade-off: riding your scooter until it is nearly empty gives you maximum range per charge but uses your battery’s limited cycles as quickly as possible. Riding to only 50% DOD gives you half the range per charge but triples the total number of cycles available.

    The practical solution is to use your battery at approximately 70–80% DOD for daily riding while giving it occasional full cycles for equalization and balancing purposes. This means charging to 100% before your longest rides and stopping at 20–30% SOC on normal daily commutes. This approach gives you most of the available range on any given day while keeping your battery cycling within a range that maximizes total cycle count. Reserve full discharges for monthly equalization purposes, not daily use.

    Practical Strategies for Maximum Daily Performance

    Keep your battery at 80% charge for typical daily use. If you ride 20 km per day and your scooter has a 50 km range at normal speeds, charge to approximately 80% each evening rather than 100%. This keeps the battery below the full-charge state where grid corrosion accelerates slightly, while maintaining sufficient charge for your daily needs. Then, once per week, perform a full charge to 100% — this balanced approach ensures all cells stay equally charged and prevents the cell imbalances that cause “weak cell” syndrome.

    Use smooth, consistent acceleration rather than full-throttle starts. When you twist the throttle fully from a stop, your battery delivers peak current that can exceed 30–50A on a powerful scooter. This high current creates heat, voltage sag, and accelerated plate stress. Starting smoothly reduces peak current draw by 30–50% for the same acceleration outcome, reducing heat generation and voltage drop. The difference in range between smooth-start and aggressive-start riding on the same route can be 15–25%. On a scooter with a 40 km theoretical range, smooth riding can deliver 40 km in conditions where aggressive riding delivers only 32–35 km.

    Manage ambient temperature during rides. Lead-acid battery capacity decreases by approximately 1% for every degree below 25°C. At 0°C, a battery delivers only 70–75% of its rated capacity. At −10°C, it delivers only 50–60%. This is why your scooter’s range drops noticeably in winter — and why riders often believe their battery is dying when it is simply cold. The solution is to keep your battery warm before rides in cold weather. If your scooter has a removable battery, bring it indoors overnight and install it just before riding. If it is fixed, park in a sheltered location rather than outdoors in freezing temperatures.

    BMS-Compatible Practices and Range Optimization

    Many modern electric scooters include a Battery Management System (BMS) that monitors cell voltages, temperature, and current flow. Working with your BMS rather than against it dramatically improves both performance and longevity. Avoid triggering the BMS low-voltage cutoff regularly — this cutoff is a protection mechanism, not a target. Ride conservatively enough that you reach home or a charging point with at least 15–20% SOC remaining, giving the BMS and yourself a safety margin. When the BMS does trigger low-voltage cutoff, charge the battery as soon as possible afterward to prevent sulfation.

    For sealed lead-acid (SLA/AGM) batteries without removable water caps, the equalization process is different: charge the battery fully, then leave it on the charger in float mode for an additional 8–12 hours monthly. This allows cells with slightly lower voltage to catch up and equalizes the overall pack. If your scooter’s charger lacks a float mode, a smart charger with a maintenance/conditioning mode serves this purpose effectively.

    Real-world range optimization tips: Reduce total weight carried on the scooter by removing unnecessary items — each 5 kg of extra weight reduces range by approximately 3–5% at typical speeds. Keep tires properly inflated — underinflated tires (below recommended pressure) increase rolling resistance by 15–30% on hard surfaces, dramatically reducing range. Maintain a steady speed rather than constantly accelerating and decelerating — use regenerative braking if available to recapture some energy during deceleration. Avoid riding into strong headwinds at maximum speed, as aerodynamic drag increases with the cube of speed — doubling your speed increases drag approximately eightfold.

  • Electric Scooter Battery Care Routine: Weekly Checklist for Riders

    Electric Scooter Battery Care Routine: Weekly Checklist for Riders

    Consistent battery maintenance does not have to be time-consuming to be effective. Five minutes per week, combined with a slightly more thorough check once per month, can add 50–100% more cycles to your electric scooter battery compared to no maintenance at all. The key is building a simple, repeatable routine that fits into your existing habits. Most riders charge their scooter daily or every other day anyway — adding a brief visual and physical inspection to your existing charging routine is the most practical approach. Below is a practical checklist designed for daily commuters who want proven battery care without professional expertise or expensive tools.

    Weekly Battery Care Checklist

    The weekly routine should take approximately 5–10 minutes and aligns with your regular charging session. Perform these checks at the start of your week or before your first charge.

    TaskWhat to DoWarning Signs

    |